2023. 7. 7. 15:04ㆍC# & Unity 공부
이번 시간에는 힘을 주어서 물체를 움직여보겠다.
RigidBody 컴포넌트에 집중하면 된다.
컨트롤하기 위해선 Editor로만은 안되고 스크립트를 사용하여야 한다.
스크립트를 만들어서 가장 중요한 공에다가 집어넣자.
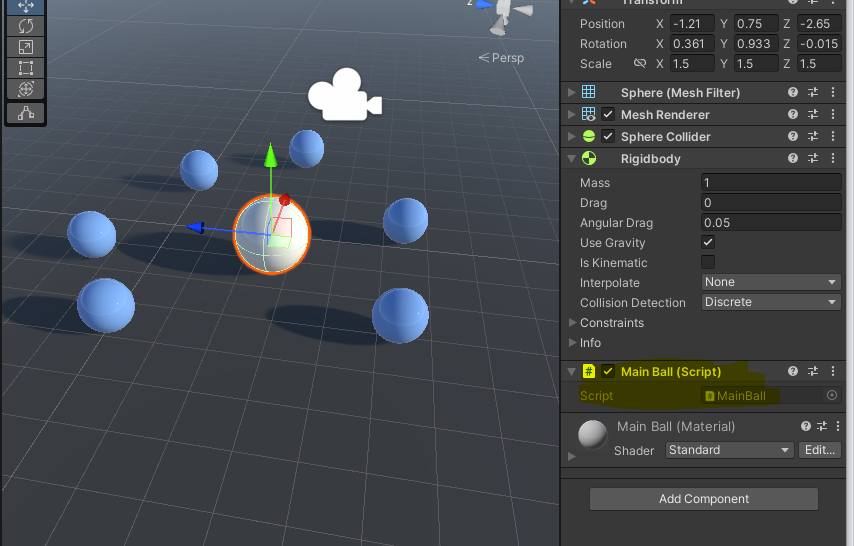
우선 첫 단계는, Rigidbody에 있는 컴포넌트를 스크립트에 변수로 담아야 한다.
using System.Collections;
using System.Collections.Generic;
using UnityEngine;
public class MainBall : MonoBehaviour
{
Rigidbody rigid; //선언
// Start is called before the first frame update
void Start()
{
rigid = GetComponent<Rigidbody>(); //GetComponent<T>함수 : 자신의 T타입 컴포넌트를 가져옴.
//rigid.velocity = Vector3.right; //오른쪽 방향으로 이동하게 됨 (속도 재설정)
//rigid.velocity = new Vector3(2, 4, 3); //한번만 이 힘을 주게 됨
rigid.AddForce(Vector3.up * 50, ForceMode.Impulse); //AddForce(Vec) : Vec의 방향과 크기로 힘을 줌
//AddForce(벡터, 힘모드) Impulse는 무게에 영향을 받음
}
// Update is called once per frame
void Update()
{
Vector3 vec = new Vector3(Input.GetAxis("Horizontal"), 0, Input.GetAxis("Vertical"));
rigid.AddForce(vec, ForceMode.Impulse);
if (Input.GetButtonDown("Jump"))
{
rigid.AddForce(Vector3.up * 50, ForceMode.Impulse);
}
Debug.Log(rigid.velocity);
rigid.AddTorque(Vector3.up); //AddTorque(vec) 함수 : Vec 방향을 축으로 회전력이 생김
}
void FixedUpdate()
{
//rigid.velocity = new Vector3(2, 4, 3); //FixedUpdate에다가 넣어주면 계속 힘을 받게 됨
/* //물리현상이기 때문에 Update보다는 FixedUpdate에 쓰는 것을 권장함
if (Input.GetButtonDown("Jump"))
{
rigid.AddForce(Vector3.up*50,ForceMode.Impulse);
}
Debug.Log(rigid.velocity);
*/
}
}
배운 내용:
1. Rigidbody 선언하고 컴포넌트 갖고 오기 ( Rigidbody 변수 선언 후, GetComponent<Rigidbody>() )
2. 속력 바꾸기 (rigid.velocity)
3. 힘 가하기 (rigid.AddForce)
4. 회전력 가하기 (rigid.AddTorque)
'C# & Unity 공부' 카테고리의 다른 글
| 8. 게임 인터페이스 구현 (1) | 2023.07.08 |
|---|---|
| 7. 물리 충돌 & 트리거 이벤트 (+Wind Zone 구현) (0) | 2023.07.07 |
| 5. 실제와 같은 물체를 만들기 (0) | 2023.07.04 |
| 4. 목표 지점으로 이동시키기 (0) | 2023.06.30 |
| 3-2. 키보드와 마우스로 입력 받아 이동시키기 (0) | 2023.06.30 |